Caffe
Table of Contents
http://caffe.berkeleyvision.org/
1. setup
安装需要下面这些组件。这些组件都可以通过apt-get获得。
- libgoogle-glog-dev # glog
- libgflags-dev # gflags
- libhdf5-dev # hdf5
- liblmdb-dev # lmdb
- libleveldb-dev # leveldb
- libsnappy-dev # snappy
- libopencv-dev # opencv
- liblapack-dev libblas-dev libatlas-dev libatlas-base-dev libopenblas-dev # blas
2. arch
caffe是非常模块化的,可能这和神经网络本身就比较模块化相关。主页上有这个系统的设计哲学:
- Expression: models and optimizations are defined as plaintext schemas instead of code. # 使用google protocol-buffers来描述网络结构和参数。protobuf居然还可以使用TextFormat载入文件,之前没有不知道还有这个功能。这个功能非常适合描述大规模,结构化,human-readable的数据。
- Speed: for research and industry alike speed is crucial for state-of-the-art models and massive data. # tensor(在caffe里面叫做blob)既有gpu也有cpu实现。
- Modularity: new tasks and settings require flexibility and extension. # 下面会说到caffe的几个模块: Solver, Net, Layer, Blob.
- Openness: scientific and applied progress call for common code, reference models, and reproducibility. # 可以将训练模型参数保存下来进行分发, 存储格式则是protocol-buffers的binary.
- Community: academic research, startup prototypes, and industrial applications all share strength by joint discussion and development in a BSD-2 project.
这里先大概说一下几个模块:
- Blob: 是caffe的数据表示,可以表示输入输出数据,也可以表示参数数据。
- Layer: 不仅可以表示神经网络层,也可以表示数据输入输出层。Blob在Layer上流动(forward & backward)。
- Net: 神经网络结构,将这些Layers层叠和关联起来。
- Solver: 协调神经网络的训练和测试,比如使用什么梯度下降以及具体参数,还支保存和恢复训练状态以及存储网络参数。
#note: prototxt描述文件大部分字段都非常好理解。对于不好理解的字段,或者是不知道有哪些参数的话,可以参考src/caffe/proto/caffe.proto. 这个文件里面每个字段都有比较详细说明。
2.1. Blob
Blob是一个四维连续数组(4-D contiguous array, type = float32), 使用(n, k, h, w)表示的话,那么每一维的意思分别是:
- n: number. 输入数据量,比如进行sgd时候的mini-batch大小。
- c: channel. 如果是图像数据的话可以认为是通道数量。
- h,w: height, width. 如果是图像数据的话可以认为是图片的高度和宽度。
当然Blob不一定就是用来表示图像输入数据。理解这些维度最重要的一点是,下标w是变化最快的。主页里面举了几个例子:
- the shape of blob holding 1000 vectors of 16 feature dimensions is 1000 x 16 x 1 x 1.
- For a convolution layer with 96 filters of 11 x 11 spatial dimension and 3 inputs the blob is 96 x 3 x 11 x 11.
- For an inner product / fully-connected layer with 1000 output channels and 1024 input channels the parameter blob is 1 x 1 x 1000 x 1024.
Blob内部其实有两个字段data, diff. data表示流动数据(输出数据),而diff则存储BP的梯度。data/diff可以存储于cpu, 也可以存储于gpu. 如果某个layer不支持gpu的话,那么就需要将gpu数据copy到cpu上,造成性能开销。对于python/numpy用户来说,可以用reshape函数来转换为blob: data = data.reshape((-1, c, h, w))
2.2. Layer
caffe提供了许多内置layer,比如convolution layer, pool layer, dropout layer, nonlinearity layer等。这些层说明以及具体参数都可以在 这里 查到(文档比代码有一些滞后,文档里面没有说支持了dropout但是实际已经提供)。每个layer有输入一些'bottom' blobs, 输出一些'top' blobs. 输入层是"data"和"label" blobs.
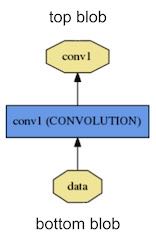
Each layer type defines three critical computations: setup, forward, and backward.
- Setup: initialize the layer and its connections once at model initialization. # 初始化工作
- Forward: given input from bottom compute the output and send to the top. # 前向转播
- Backward: given the gradient w.r.t. the top output compute the gradient w.r.t. to the input and send to the bottom. A layer with parameters computes the gradient w.r.t. to its parameters and stores it internally. # 反向转播/计算梯度
caffe支持的layer完整在 http://caffe.berkeleyvision.org/tutorial/layers.html, 部分data layer还支持 预处理 操作
#note: 有可能文档上名字和实际代码对不上,如果是这样的话可以阅读src/caffe/layers/*_layer.cpp找到REGISTER_LAYER_CLASS(name). 其中name就是注册的字符串
2.3. Net
net是layers组成的DAG, 并且可以使用文本格式来描述(protocol-buffers TextFormat). 比如下面文本生成的是logistic regression.
name: "LogReg"
layers {
  name: "mnist"
  type: DATA
  top: "data"
  top: "label"
  data_param {
    source: "input_leveldb"
    batch_size: 64
  }
}
layers {
  name: "ip"
  type: INNER_PRODUCT
  bottom: "data"
  top: "ip"
  inner_product_param {
    num_output: 2
  }
}
layers {
  name: "loss"
  type: SOFTMAX_LOSS
  bottom: "ip"
  bottom: "label"
  top: "loss"
}
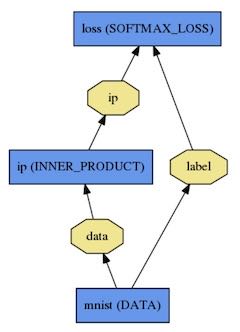
Net有个初始化函数Init(). 它的作用有两个:1. 创建blosb和layers; 2. 调用layers的SetUp函数来初始化layers. 在这个过程中会打印日志来说明。注意在这个阶段并没有指明说是用GPU还是CPU来训练,指定使用什么训练是在solver层面的事情,这样可以将模型和实现分离。Net还有Forward和Backward两个函数,分别调用各个Layers的forward/backward. 最周如果我们进行预测的话,我们先填充好input blobs, 然后调用forward函数,最后获取output blobs作为预测结果。
I0902 22:52:17.931977 2079114000 net.cpp:39] Initializing net from parameters:
name: "LogReg"
[...model prototxt printout...]
# construct the network layer-by-layer
I0902 22:52:17.932152 2079114000 net.cpp:67] Creating Layer mnist
I0902 22:52:17.932165 2079114000 net.cpp:356] mnist -> data
I0902 22:52:17.932188 2079114000 net.cpp:356] mnist -> label
I0902 22:52:17.932200 2079114000 net.cpp:96] Setting up mnist
I0902 22:52:17.935807 2079114000 data_layer.cpp:135] Opening leveldb input_leveldb
I0902 22:52:17.937155 2079114000 data_layer.cpp:195] output data size: 64,1,28,28
I0902 22:52:17.938570 2079114000 net.cpp:103] Top shape: 64 1 28 28 (50176)
I0902 22:52:17.938593 2079114000 net.cpp:103] Top shape: 64 1 1 1 (64)
I0902 22:52:17.938611 2079114000 net.cpp:67] Creating Layer ip
I0902 22:52:17.938617 2079114000 net.cpp:394] ip <- data
I0902 22:52:17.939177 2079114000 net.cpp:356] ip -> ip
I0902 22:52:17.939196 2079114000 net.cpp:96] Setting up ip
I0902 22:52:17.940289 2079114000 net.cpp:103] Top shape: 64 2 1 1 (128)
I0902 22:52:17.941270 2079114000 net.cpp:67] Creating Layer loss
I0902 22:52:17.941305 2079114000 net.cpp:394] loss <- ip
I0902 22:52:17.941314 2079114000 net.cpp:394] loss <- label
I0902 22:52:17.941323 2079114000 net.cpp:356] loss -> loss
# set up the loss and configure the backward pass
I0902 22:52:17.941328 2079114000 net.cpp:96] Setting up loss
I0902 22:52:17.941328 2079114000 net.cpp:103] Top shape: 1 1 1 1 (1)
I0902 22:52:17.941329 2079114000 net.cpp:109]     with loss weight 1
I0902 22:52:17.941779 2079114000 net.cpp:170] loss needs backward computation.
I0902 22:52:17.941787 2079114000 net.cpp:170] ip needs backward computation.
I0902 22:52:17.941794 2079114000 net.cpp:172] mnist does not need backward computation.
# determine outputs
I0902 22:52:17.941800 2079114000 net.cpp:208] This network produces output loss
# finish initialization and report memory usage
I0902 22:52:17.941810 2079114000 net.cpp:467] Collecting Learning Rate and Weight Decay.
I0902 22:52:17.941818 2079114000 net.cpp:219] Network initialization done.
I0902 22:52:17.941824 2079114000 net.cpp:220] Memory required for data: 201476
如果阅读caffe/models会发现,这些例子下面有train.prototxt,还有一个deploy.prototxt. 差别仅仅在于deploy.txt没有data-layer,而是在指定输入的shape.
input: "data"
input_dim: 10
input_dim: 1
input_dim: 28
input_dim: 28
从字面上来看train.prototxt是用来训练出model的,而deploy.prototxt则是用来进行预测的。下面是使用python进行预测的代码:
#note: 我没有使用caffe自身提供的classifier.py, 因为我发现Classifier会对input做一些处理。在进行实验的时候我发现使用Classifier得到的结果比直接使用Net::forward_all接口要差很多。
caffe.set_mode_cpu()
net = caffe.Net('caffe-conf/test.prototxt',
                'uv_iter_10000.caffemodel',
                caffe.TEST)
data = data.reshape((-1, 1, 28, 28))
out = net.forward_all(**{'data': data})
rs = out['prob'] # 得到的是softmax.
print_timer("predict")
2.4. Solver
solver做了下面这些事情:
- scaffolds the optimization bookkeeping and creates the training network for learning and test network(s) for evaluation.
- iteratively optimizes by calling forward / backward and updating parameters # Solver::ComputeUpdateValue()
- (periodically) evaluates the test networks
- snapshots the model and solver state throughout the optimization
- Solver::Snapshot() / Solver::Restore() # 保存和恢复网络参数, 后缀.caffemodel
- Solver::SnapshotSolverState() / Solver::RestoreSolverState() # 保存和恢复运行状态,后缀.solverstate
- 文件名称是<prefix>_iter_<N>,其中prefix是指定前缀,N表示迭代轮数。
solver每轮迭代做了下面这些事情:
- calls network forward to compute the output and loss
- calls network backward to compute the gradients
- Stochastic Gradient Descent (SGD),
- Adaptive Gradient (ADAGRAD),
- and Nesterov’s Accelerated Gradient (NESTEROV).
- 如何选择和设置参数可以看 这里
- incorporates the gradients into parameter updates according to the solver method
- updates the solver state according to learning rate, history, and method
下面是solver.prototxt的一个示例(从examples/mnist/修改过来的)
# The train/test net protocol buffer definition
net: "caffe-conf/train.prototxt"

# 如果test数据量是10000,而bacth_size = 100的话,那么test_iter就应该设置100
# 这样每次进行test就可以把所有的cases都使用上了
test_iter: 90
# Carry out testing every 500 training iterations.
# 每进行500轮迭代进行一次测试
test_interval: 500

# 下面这些是训练使用参数
# The base learning rate, momentum and the weight decay of the network.
base_lr: 0.01
momentum: 0.9
weight_decay: 0.0005
# The learning rate policy
lr_policy: "inv"
gamma: 0.0001
power: 0.75

# Display every 100 iterations
display: 500
# The maximum number of iterations
max_iter: 10000
# snapshot intermediate results
# 每进行500轮做一次snapshot.
# 每一轮使用的数据量大小为batch_size.
snapshot: 500
snapshot_prefix: "uv"
snapshot_after_train: true
# solver mode: CPU or GPU
# 使用CPU训练
solver_mode: CPU
"net"表示train和test使用同一个net. 在net.prototxt中可以使用include语法来声明说,某个layer是否需要包含在train/test阶段.
如果你在训练时候不想进行test的话,那么可以指定上面的"net"为"train_net". 当然你也可以使用"test_nets"来指定多个test_net.
3. python
http://caffe.berkeleyvision.org/tutorial/interfaces.html
caffe interfaces有三种: 1. command line 2. python binding 3. matlab binding. 这里就只写python binding. caffe/examples下面有一些ipynb可以使用ipython-notebook查看。
caffe的python binding功能还是非常完备的
- caffe.Net is the central interface for loading, configuring, and running models. caffe.Classsifier and caffe.Detector provide convenience interfaces for common tasks.
- caffe.SGDSolver exposes the solving interface.
- caffe.io handles input / output with preprocessing and protocol buffers.
- caffe.draw visualizes network architectures.
- Caffe blobs are exposed as numpy ndarrays for ease-of-use and efficiency.
我写了个 示例 来解决 kaggle上 手写数字识别 问题,prototxt是在examples/mnist基础上稍作修改的(增加了一个dropout)。
LB上的0.99586不是真实成绩,这个是用mnist自带的数据跑出的模型,而不是kaggle给出的数据。使用kaggle给出的数据最高跑到0.99071. 如果要改进的话,估计可以在caffe-prepare.py上多做一些数据变化来增加数据样例大小(现在只是做了rotate).
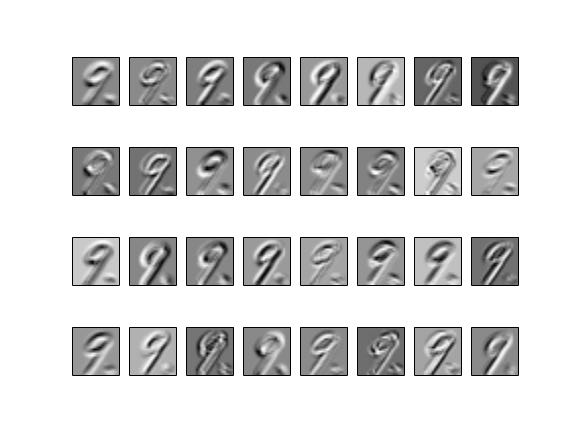
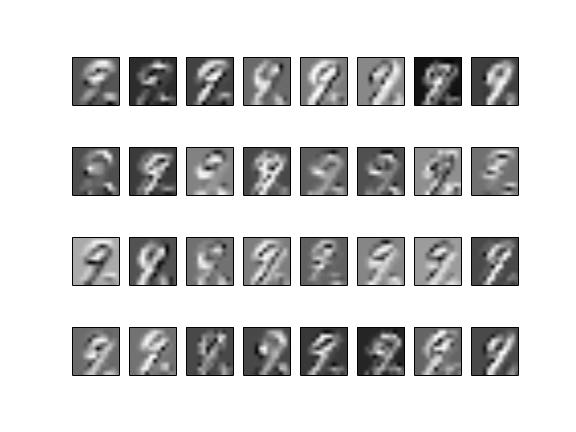
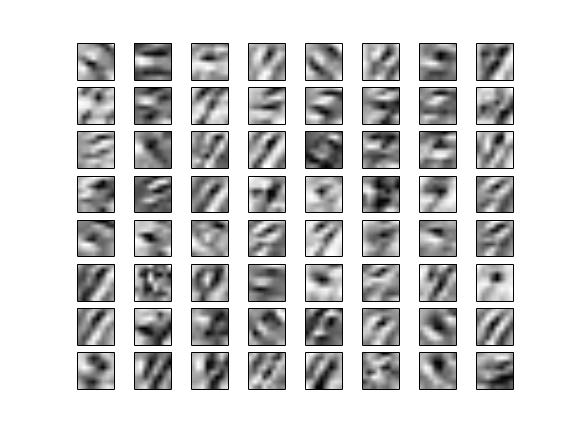
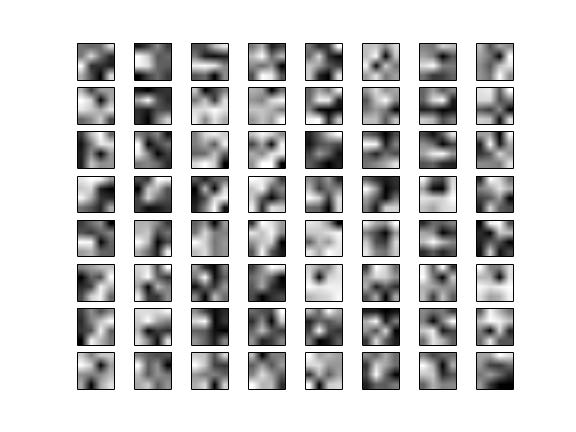
训练完成之后,使用某个case作为输入,可以画出conv1, pool1, conv2, pool2输出图像。
